How to create a room for Thimbleweed Park
In this post I will explain how to create a room for Thimbleweed Park, more precisely I will create the Scumm Bar of The Secret of Monkey Island.
The steps
Here is a video of the new room that we will create (without the dialogs, maybe it will be in another tutorial).
The steps to create the new room:
- install the tools
- create your spritesheet
- create the room
- create the room script
- pack the files
Prerequisites
To accomplish our task, you will need theses tools:
- Thimbleweed Park (this is obvious)
- Images from Monkey Island 1
- TexturePacker to create a spritesheet from images
- WimpyViewer: a tool to edit room for Thimbleweed Park
- ggpack tools: to pack all files, rooms, images, scripts and so on for Thimbleweed Park, this will create a
ThimbleweedPark.ggpack1file.
Watch out! Before starting, make a copy of your original ThimbleweedPark.ggpack1 file
Create your spritesheet
Run Texture Packer or use can use a free alternative like Free Texture Packer
Drag and drop all your images, you should have something like this
![]()
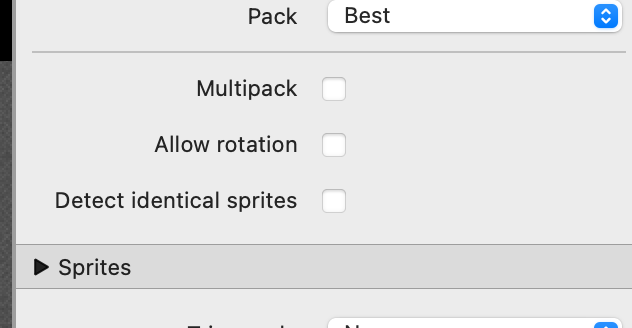
Be sure to validate this:
- Data format: JSON (Hash)
- Data file:
ScummBarSheet.json - Trim sprite names
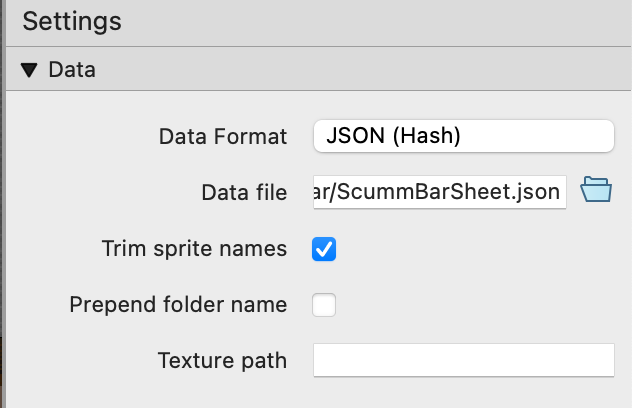
- Allow rotation: unchecked
Then click on Publish sprite sheet, you should have now 2 files: ScummBarSheet.json and ScummBarSheet.png
🥳 Congratulations 🥳, the first part is done.
Create the room
Before creating the room you need to setup your environment, first we need to create a specific folder structure like this:
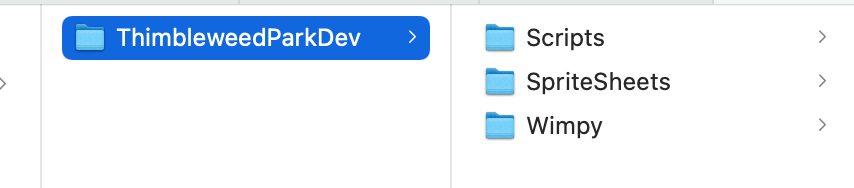
- Wimpy: this is where you create your room file
- SpriteSheets: this folder contains the spritesheet files
- Scripts: this one contains the room scripts
Create the room template
Create a file and name it ScummBar.wimpy and paste this:
{
  "background": "background",
  "fullscreen": 2,
  "height": 172,
  "name": "ScummBar",
  "objects": [],
  "roomsize": "{640,240}",
  "scaling": [
    "0.6@89",
    "0.6@118"
  ],
  "sheet": "ScummBarSheet",
  "walkboxes": []
}
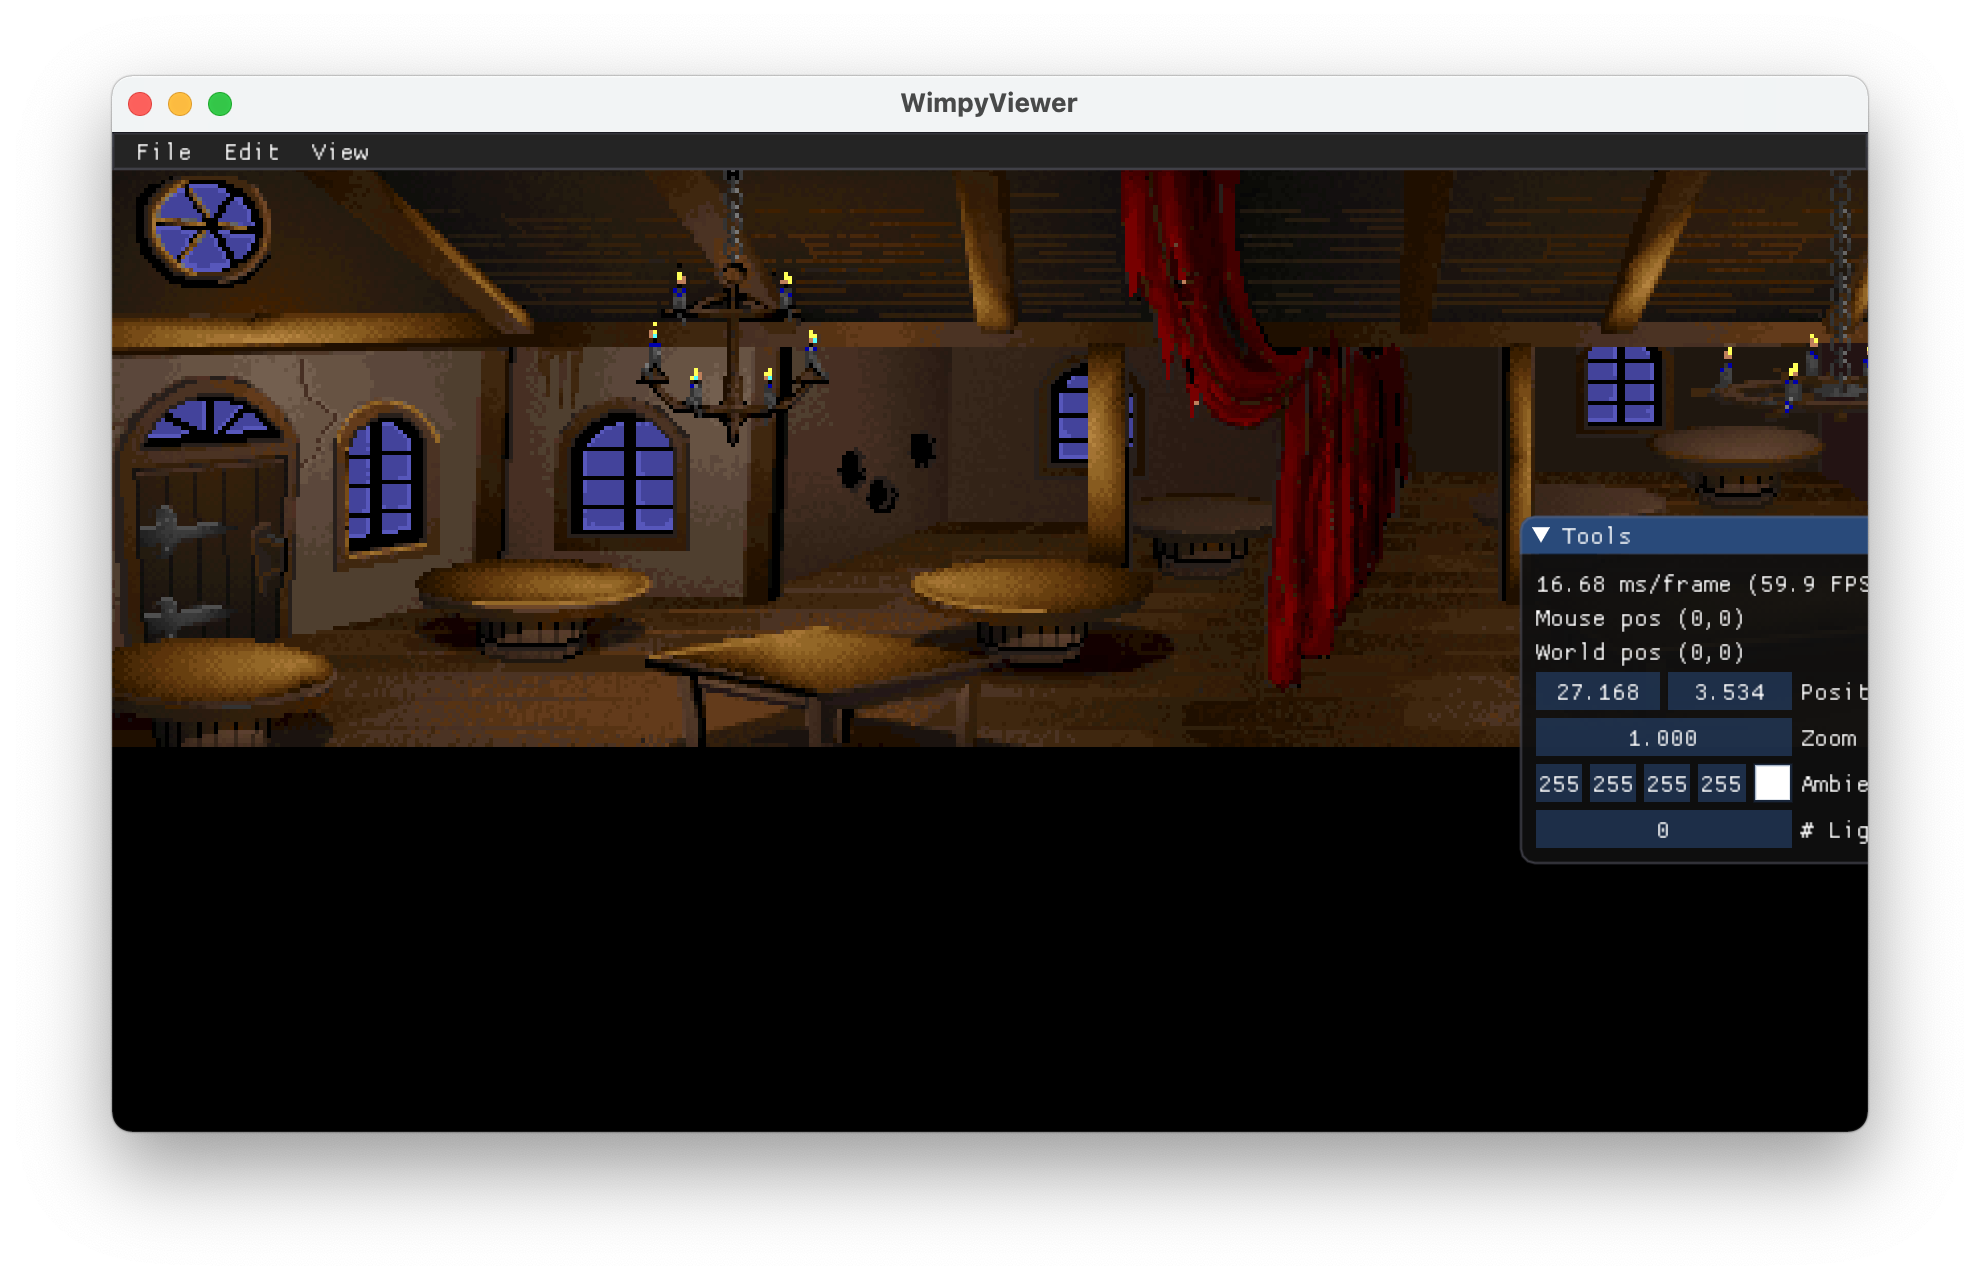
Then run WimpyViewer and drag and drop your wimpy file into it, you should see an empty room like this:
Create the objects
Go in the menu Edit and select New object... or use the shortcut N
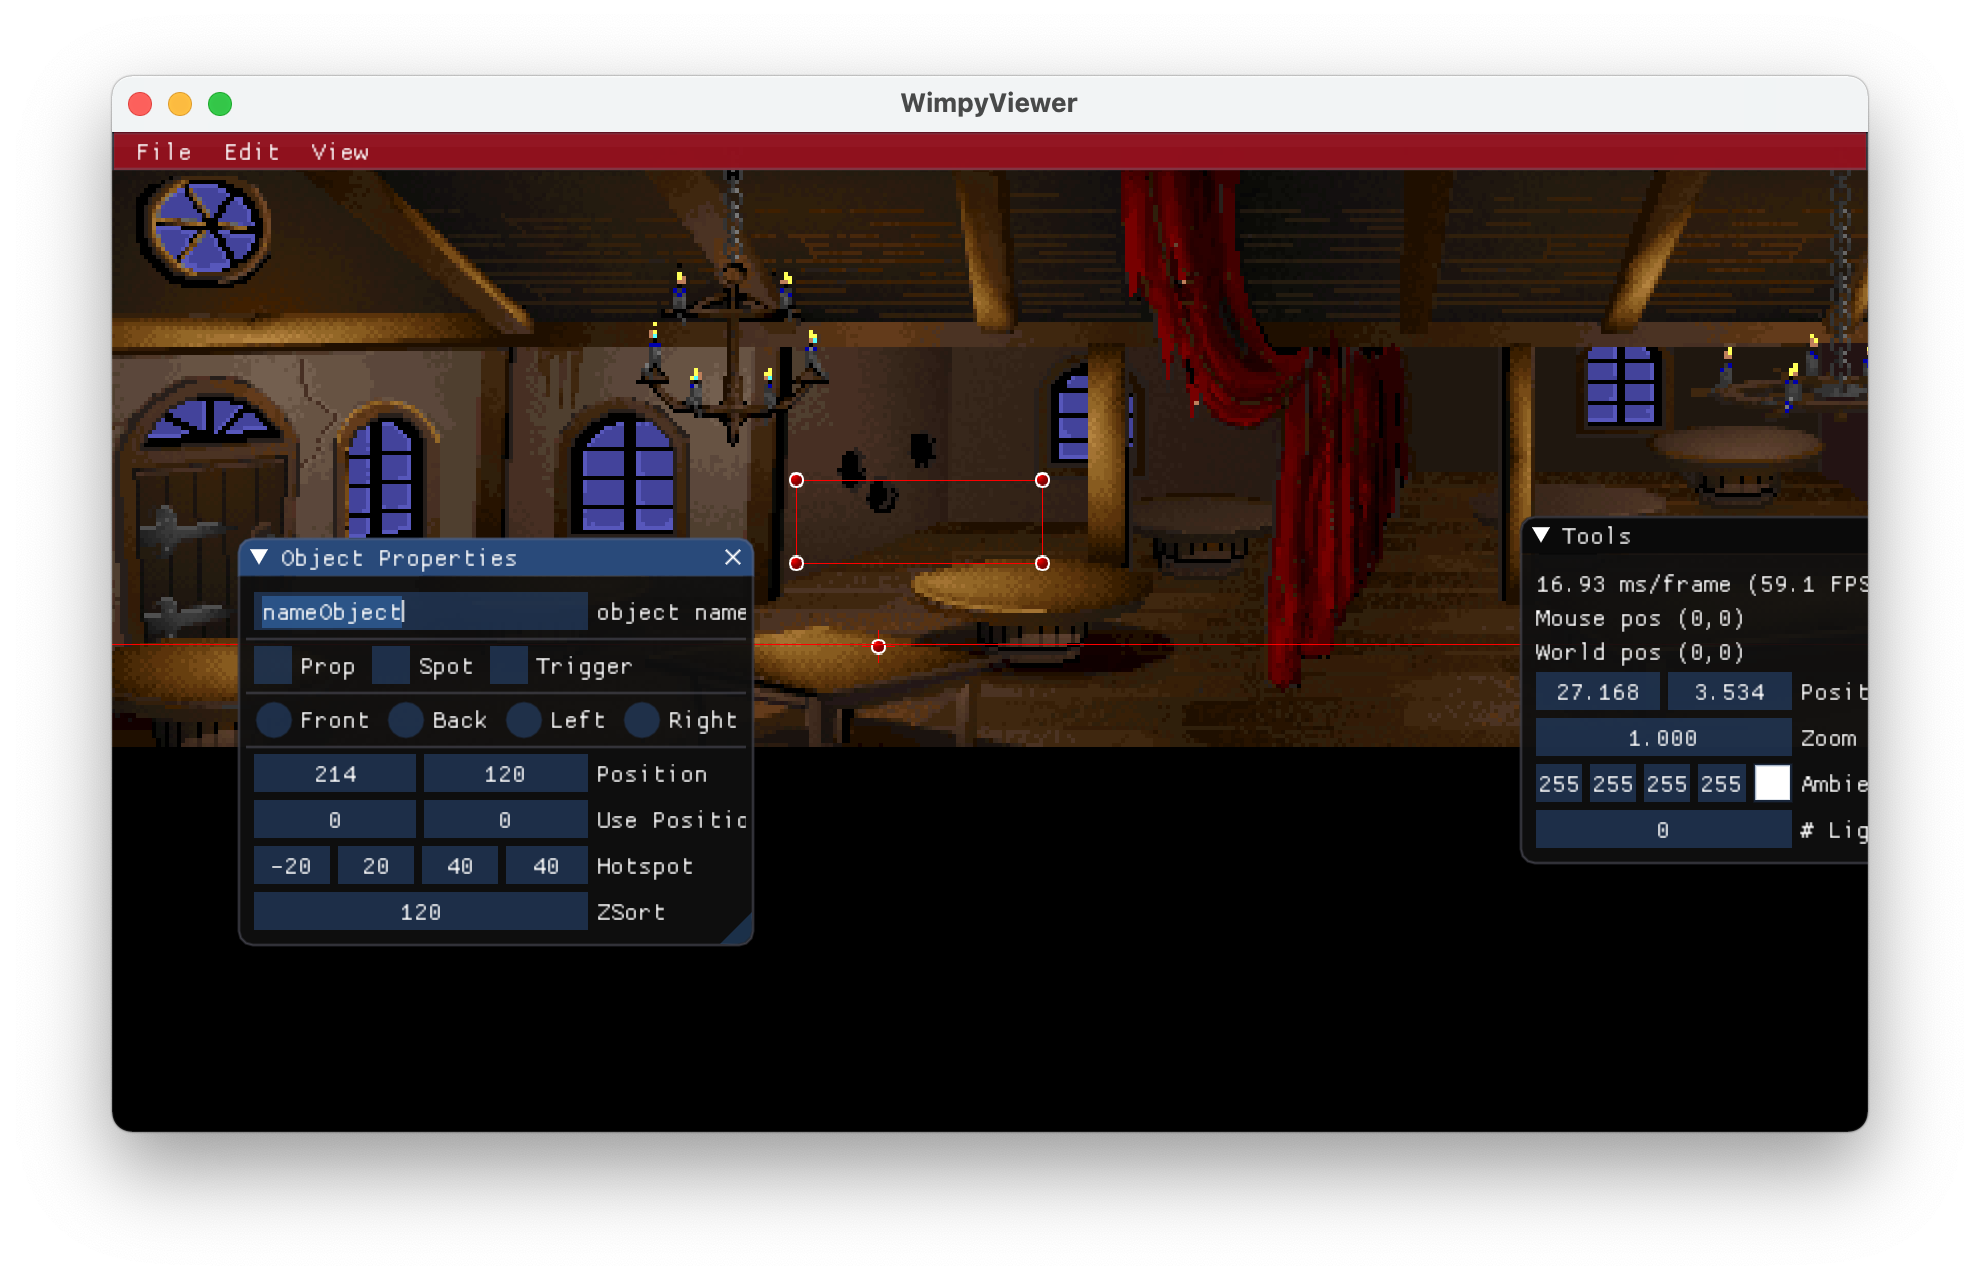
Rename it scummBarDoor, don’t change the following properties.
And here starts the fun part.
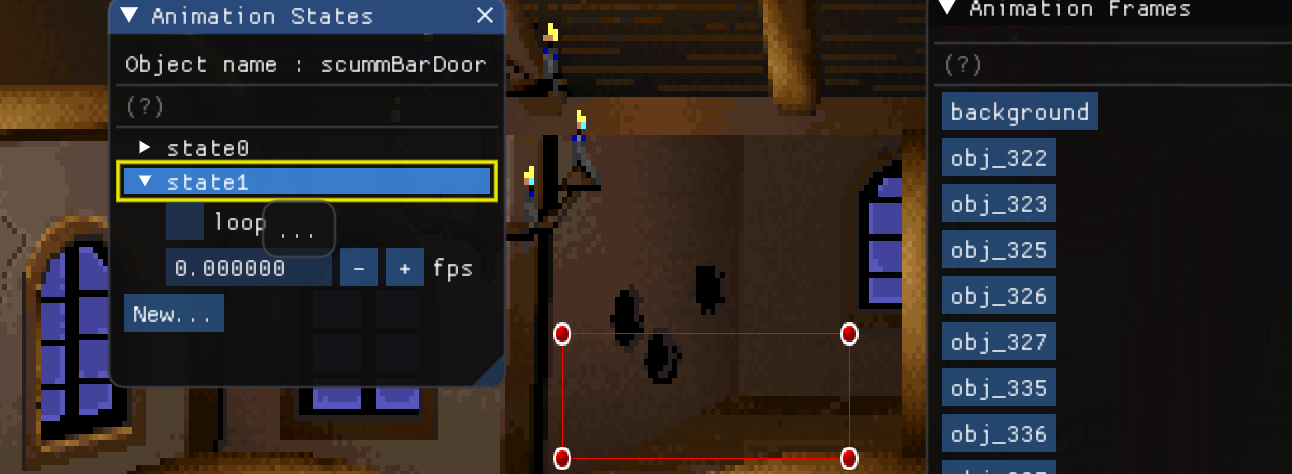
Go in the menu Edit and select Edit Animations... or use the shortcut A, click on New... and type state0, start again and create a state1.

In Animation states window, you have all the images declared in your spritesheet.
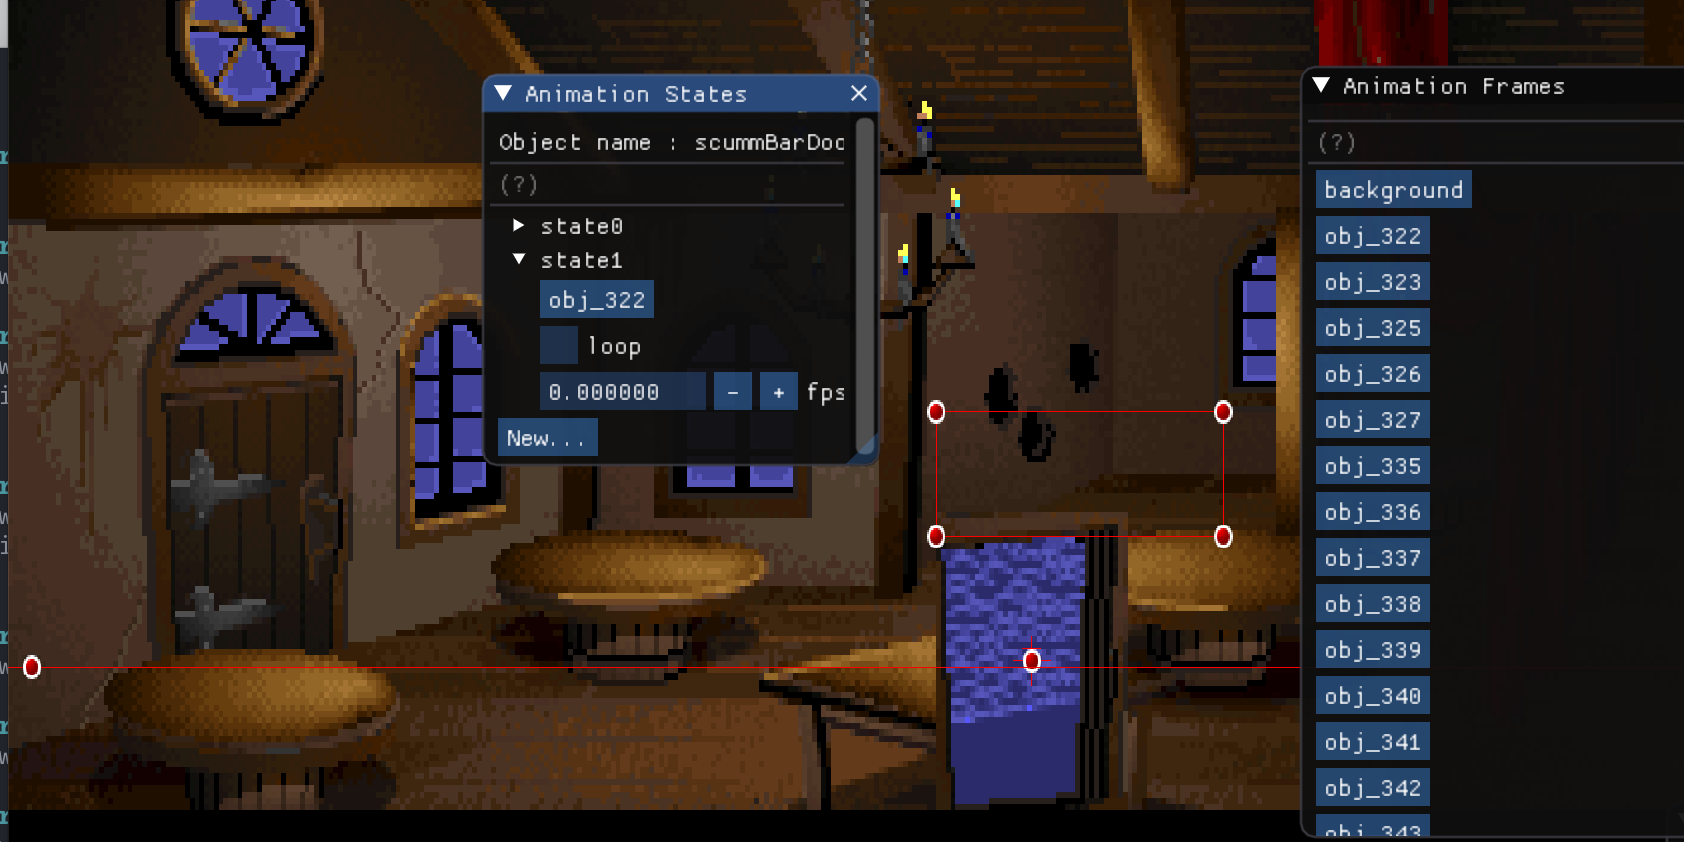
Drag and drop from Animation states window obj_322 into state1, like this.
Nothing has changed, but… if you click in the background and press key 2, now you should see the door opened, cool no?
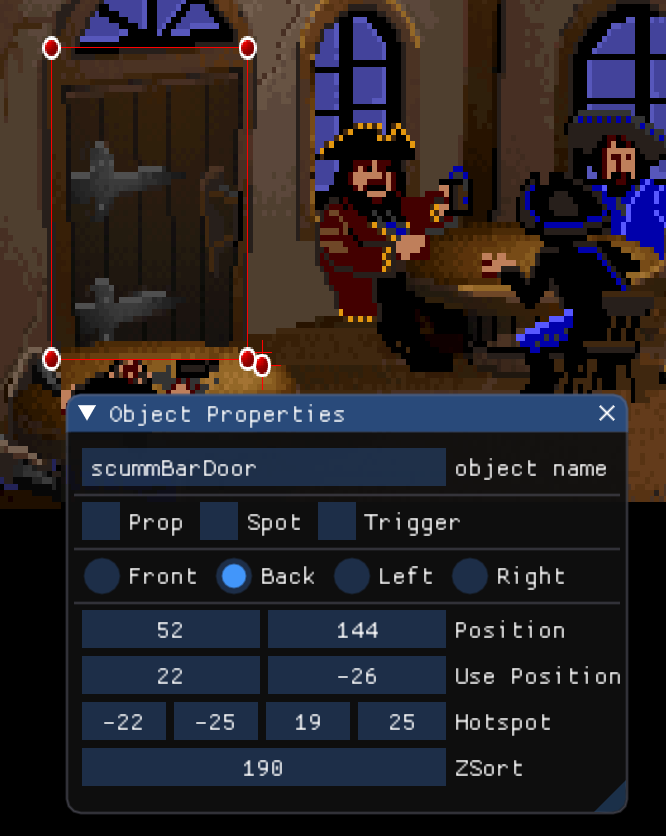
You need to change the property of the object to Prop in order to move the door to the correct position.
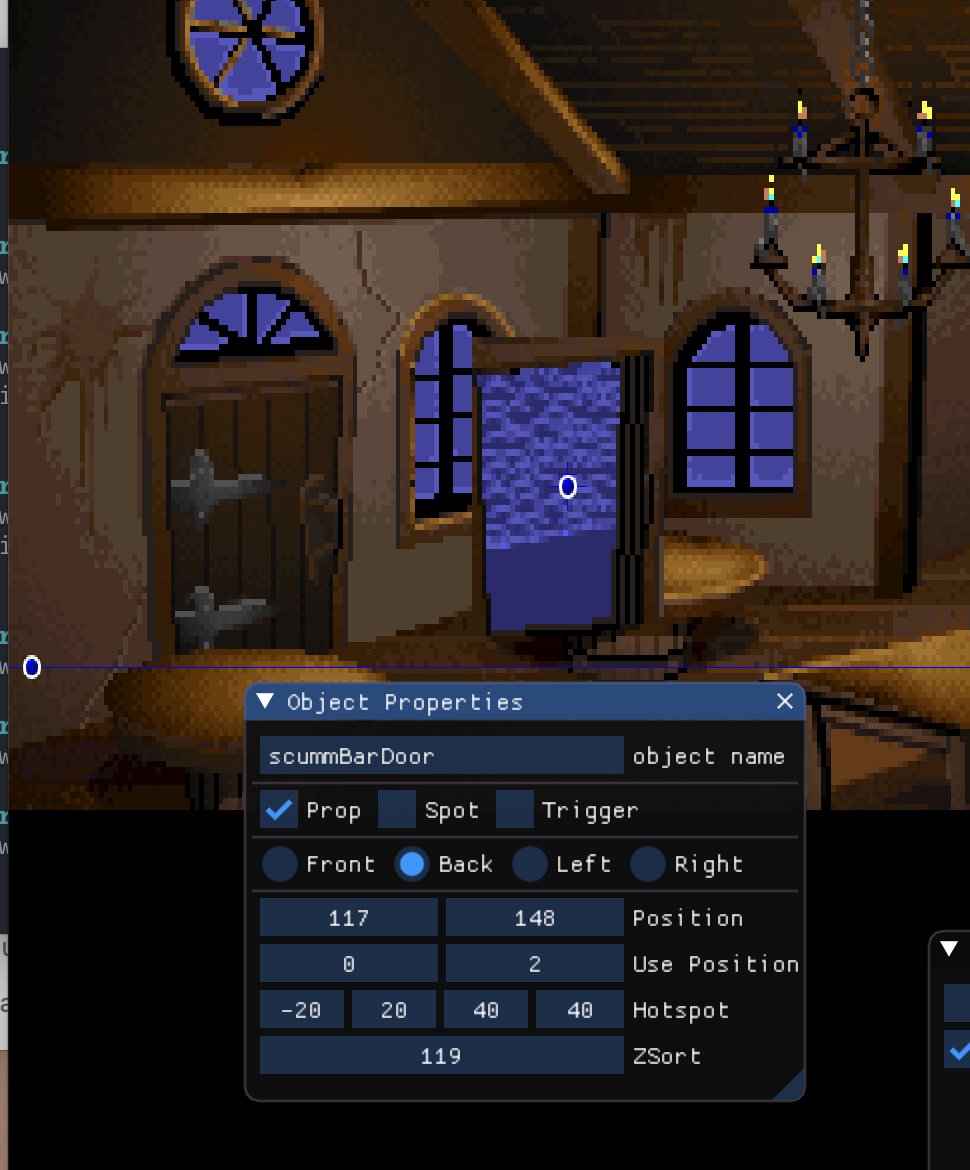
And now once again if you click in the background, you can test the different states by pressing key 1 and key 2, it will set the state of the door to state0 (closed) and state1 (door) respectively.
Now we will define the hotspot for this door, but first what is a hotspot? A hotspot is the rectangular area where the mouse cursor will detect the object, here the door.
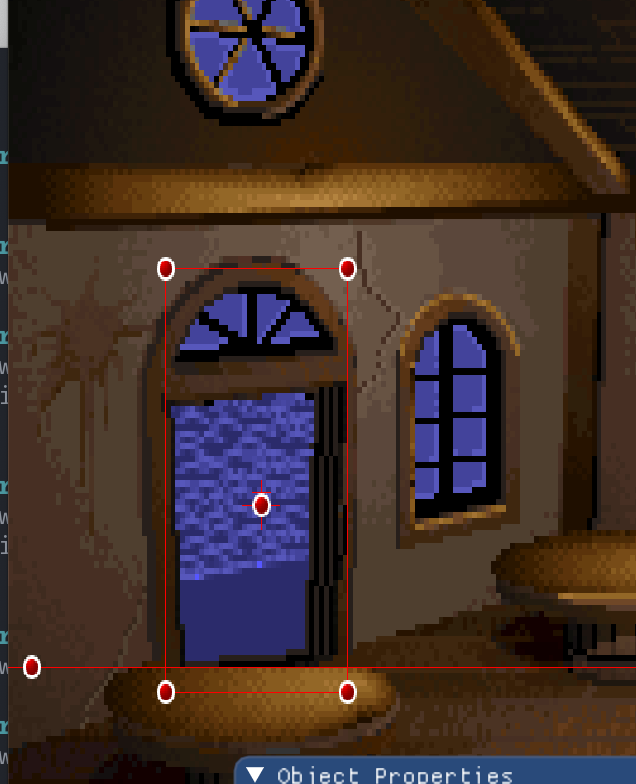
First, we need to unset the object as a Prop. Why? Because if your object is a Prop you won’t be able to interact with this object in the game.
Then we can edit the hotspot by clicking one of the handles and you need to define the use position, this position specify where the actor will move if you click on this object.
Finally, we have to define the direction of the actor when he will reach the object’s position, in our example we will see the back of the actor, so we need to define the use direction to Back.
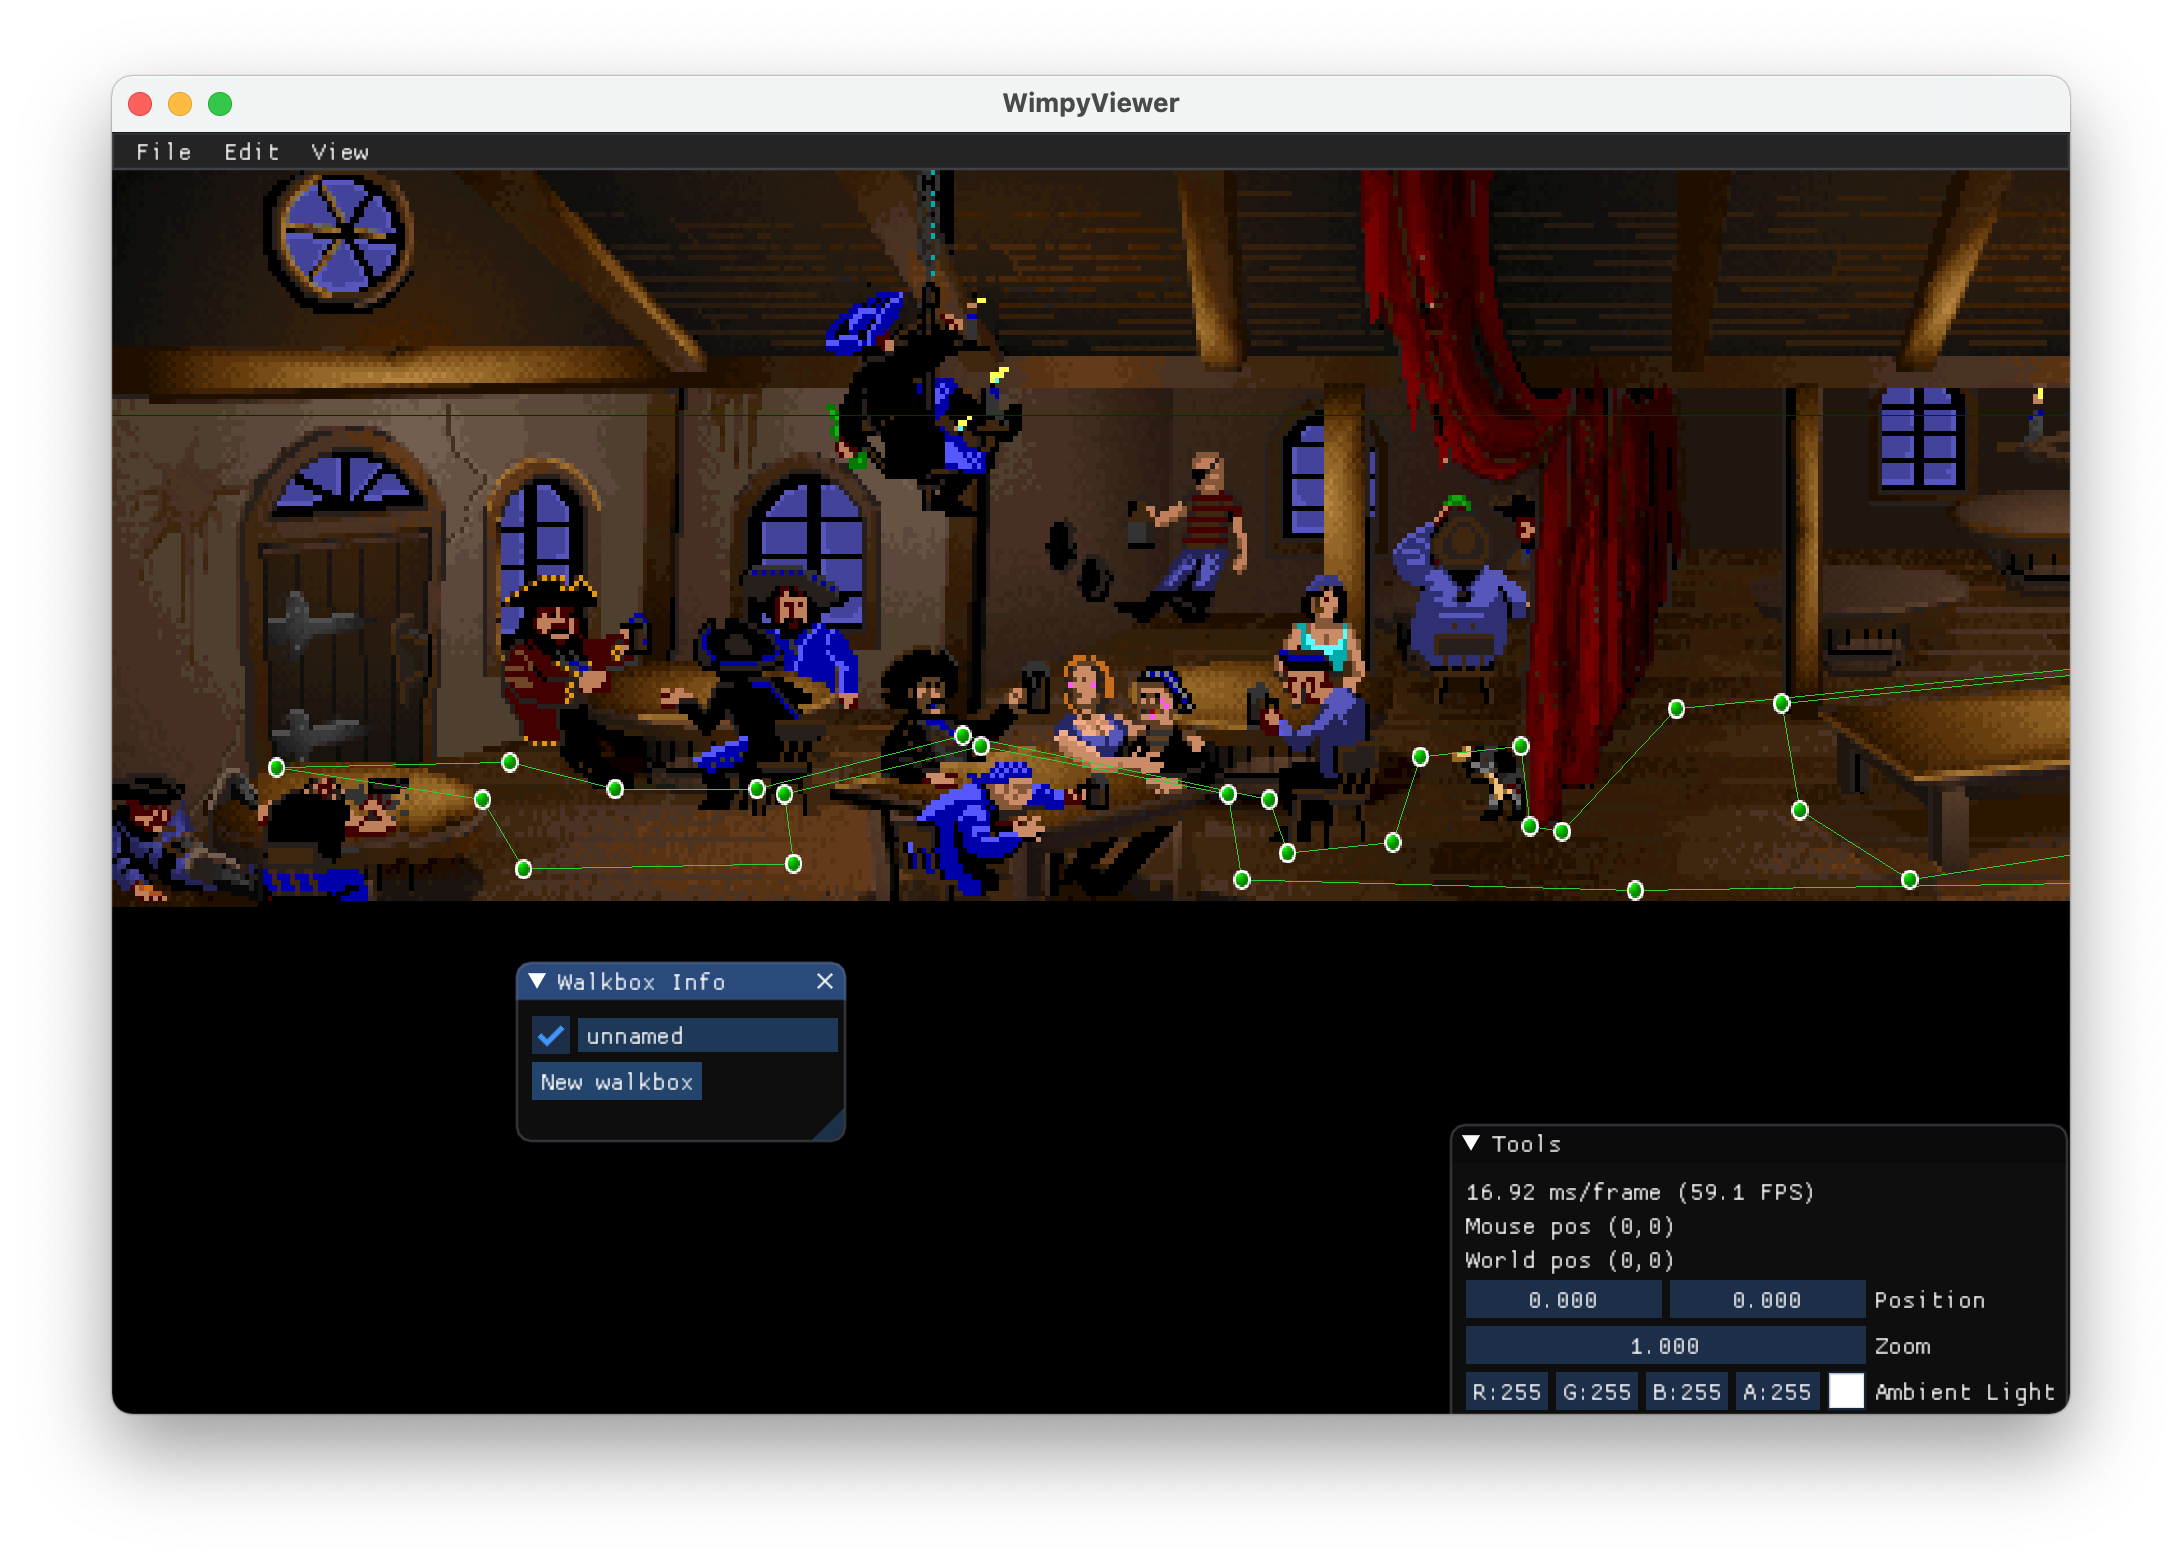
Create the wakboxes
What is a walkbox?
A walbox is a polygon where an actor (a character of the game) is able to walk.
Go to the menu View and select Show walkbox Info... and click on the New walkbox button in the Walkbox Info window. And now go to the Edit menu and select Edit walkboxes or shortcut W.
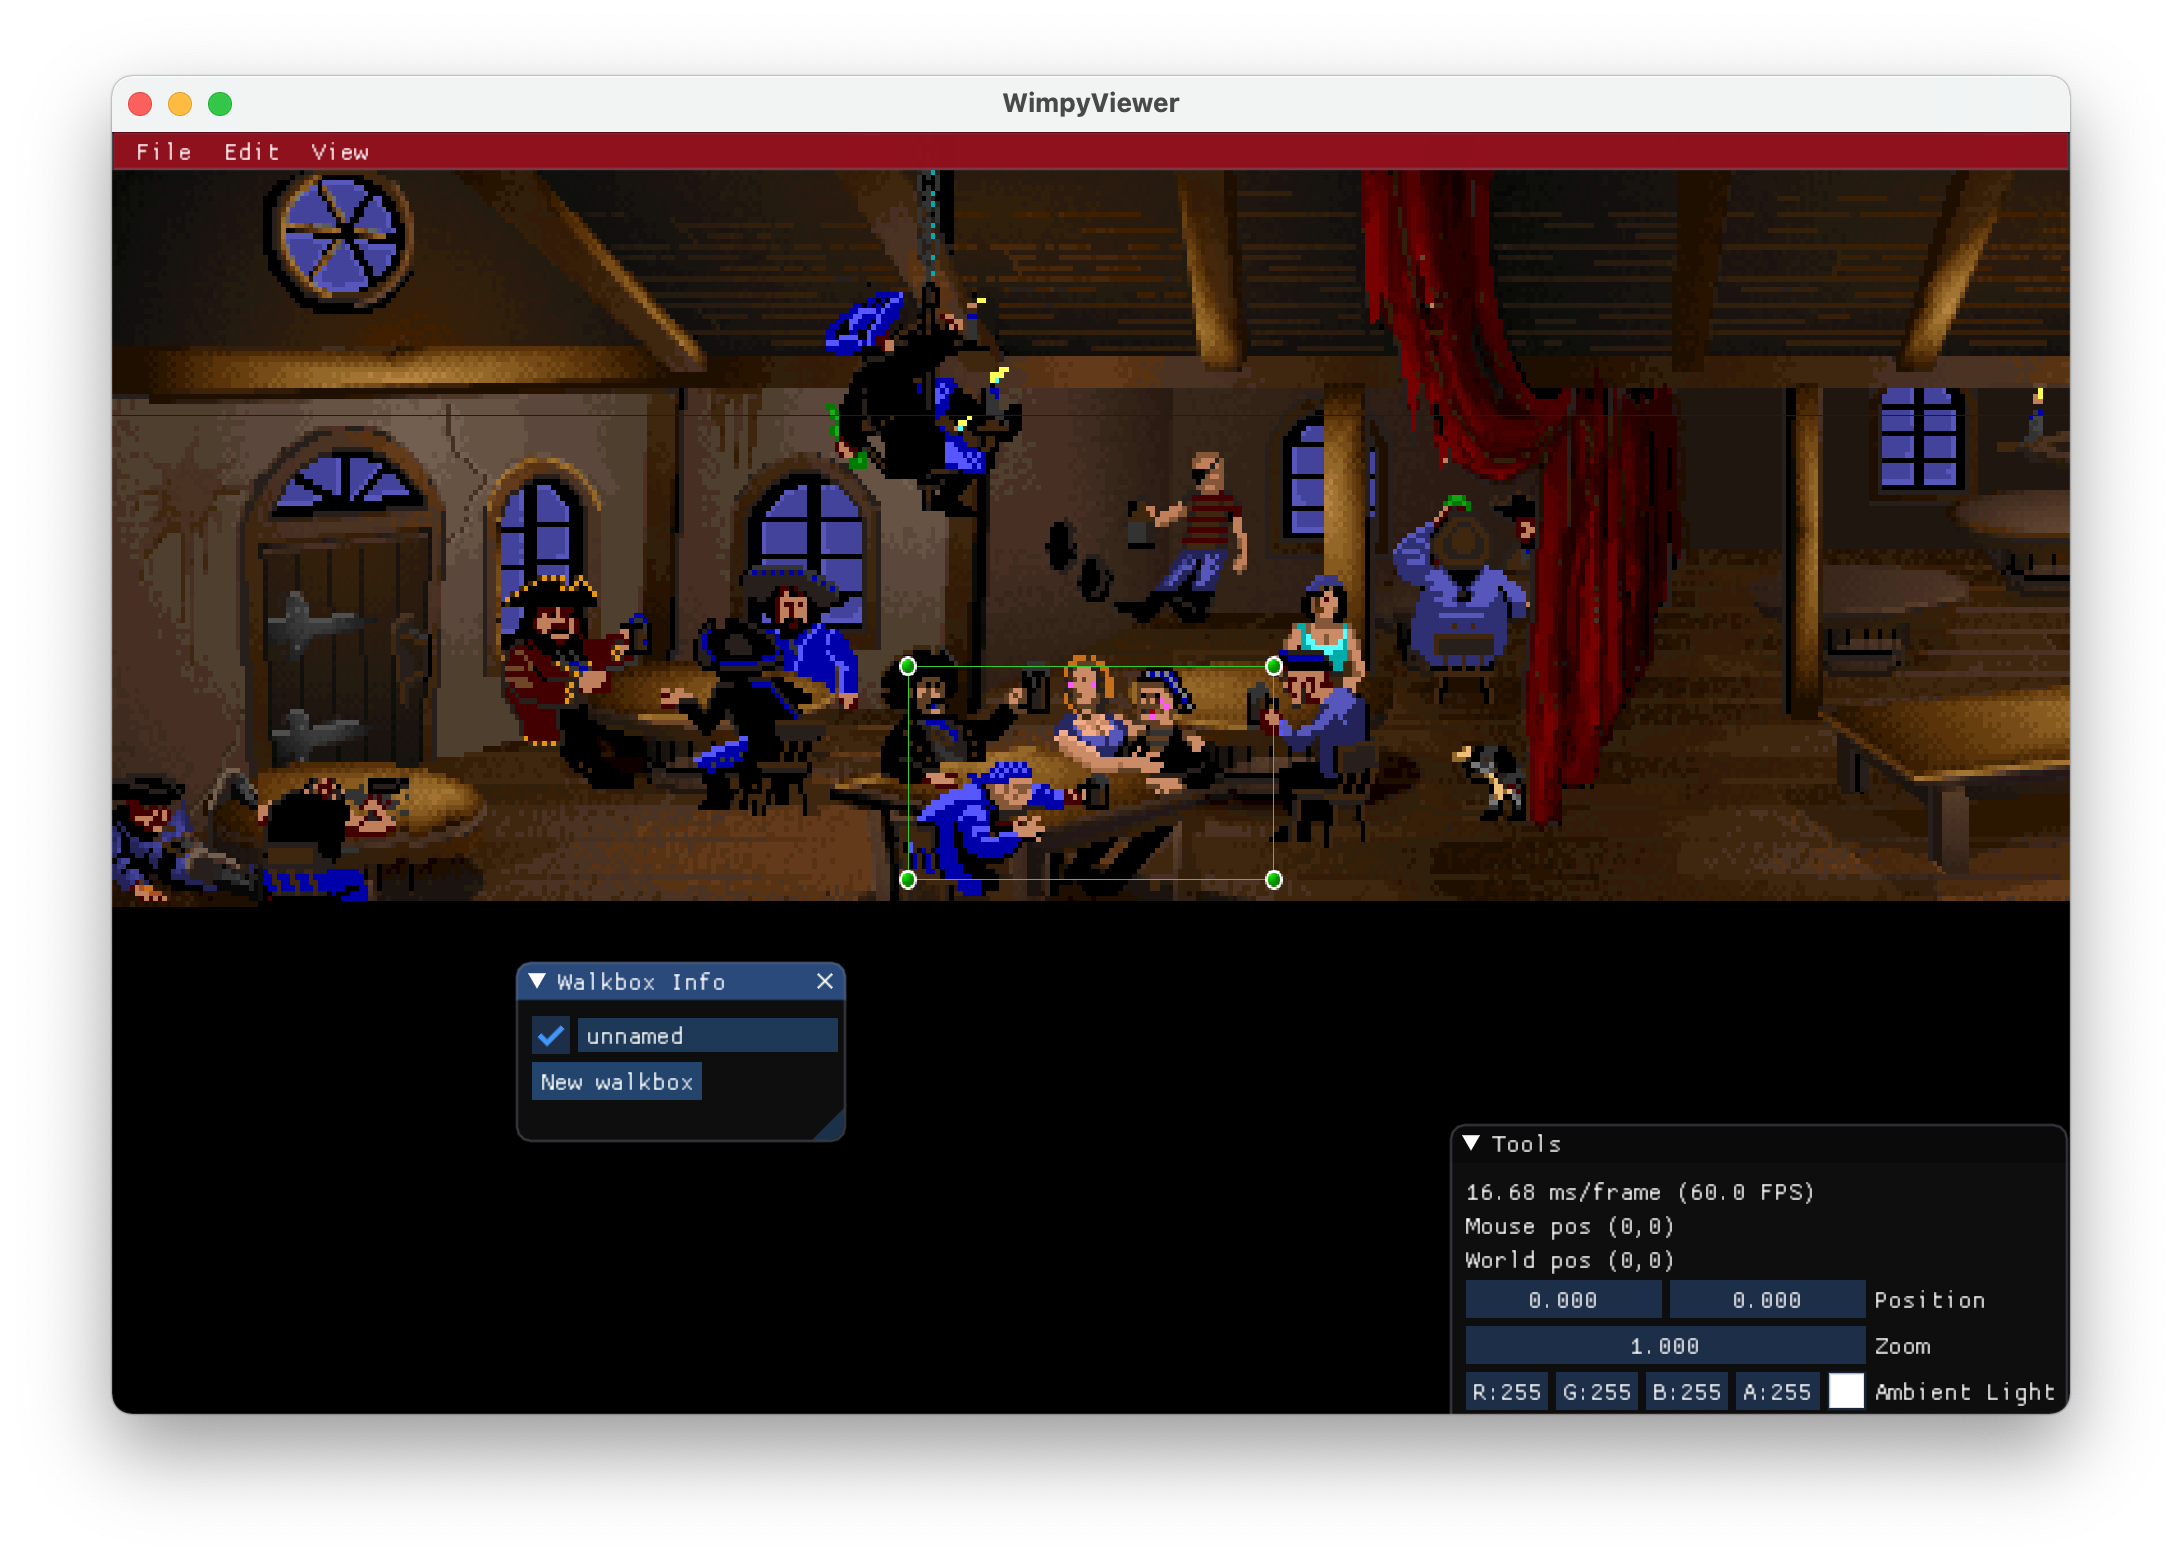
Now you can edit the handle of the walkbox, but 4 points are not enough to create our walkbox, you will need to add other points, to do this click on the right mouse button where you want to insert your point in the walkbox. To remove a point, click on the right mouse button on a point.
You should now be able to create a walkbox like this:
Now save your room, and that’s it for wimpy!
Create the room script
Create a script file named ScummBar.nut with its minimal content:
ScummBar <-
{
 background = "ScummBar"
 enter = function(door)
 {
 }
 exit = function()
 {
 }
}
A .nut file is a squirrel script file, squirrel is a language similar to lua.
In this file, we declare a table called ScummBar (the name of the room), we defined a property background set to ScummBar and 2 functions enter and exit, when the room becomes the current room, the enter function is called.
Now we want to be able to interact with the door, to do this we need to declare inside the room, a table, this table should be named scummBarDoor, the exact same name as we declare the door in the wimpy file.
scummBarDoor =
{
    name = "door"
    flags = DOOR_BACK
    defaultVerb = VERB_OPEN
    autoclose = YES
}
The property name defined the text that the cursor will display when it will be over the door’s hotspot.
flags set to DOOR_BACK indicates the direction of the cursor when it will be over it.
The property defaultVerb is handy to use a quickly an action, when you press the right mouse button button on the door, it will open it when defaultVerb is set to VERB_OPEN.
autoclose is specific to a door object, when an actor open the door, the door will be automatically closed after.
Now we need to define what to do if we execute the VERB_OPEN on this door, and what to do if we execute VERB_CLOSE, you can also add what to do when the actor walks directly to the door, and he would be useful to exit from the current room to go to the other one (in this example, we will go to the main street).
verbOpen = function()
{
    openDoors(this, MainStreet.mainStreetDinerDoor)
}
verbClose = function()
{
    closeDoors(this, MainStreet.mainStreetDinerDoor)
}
verbWalkTo = function()
{
    exitRoomFromDoor(this, MainStreet.mainStreetDinerDoor)
}
If you want your player be able to talk to someone, just add a table to the “object” you want to talk to:
pirate4 =
{
    name = "pirate"
    flags = TALKABLE
    defaultVerb = VERB_TALKTO
    verbTalkTo = function() {
        sayLine("I don't think it's wise to wake a sleeping pirate.")
    }
}
You have to set the property flags to TALKABLE to be able to talk to this pirate, set the defaultVerb to VERB_TALKTO and now you can decide what to do when the actor talks to this pirate.
In this example, we want the actor to say “I don’t think it’s wise to wake a sleeping pirate.”.
Nice 😎
OK now you have enough information to add the other interactions. Here is my final script:
ScummBar <-
{
    background = "ScummBar"
    enter = function(door)
    {
        loopObjectState(chandelier, 0)
        loopObjectState(chain, 0)
        loopObjectState(fire, 0)
        loopObjectState(pirate1, 0)
        loopObjectState(pirate2, 0)
        loopObjectState(pirate3, 0)
        loopObjectState(pirate4, 0)
        loopObjectState(pirate5, 0)
        loopObjectState(pirate6, 0)
        loopObjectState(pirate7, 0)
        loopObjectState(pirate8, 0)
        loopObjectState(pirate9, 0)
        loopObjectState(dog, 0)
    }
    exit = function()
    {
    }

    chandelier =
    {
    }
    fire =
    {
    }
    pirate4 =
    {
        name = "pirate"
        flags = TALKABLE
        defaultVerb = VERB_TALKTO
        verbTalkTo = function() {
            sayLine("I don't think it's wise to wake a sleeping pirate.")
        }
    }
    pirate5 =
    {
        name = "pirates"
        flags = TALKABLE
        defaultVerb = VERB_TALKTO
        verbTalkTo = function() {
            sayLine("I don't want to bother them.","They're busy listening to the guy on the left.")
        }
    }
    pirate8 =
    {
        name = "pirate"
        flags = TALKABLE
        defaultVerb = VERB_TALKTO
        verbTalkTo = function() {
            sayLine("I think they're busy.")
        }
    }
    pirate9 =
    {
        name = "pirate"
        flags = TALKABLE
        defaultVerb = VERB_TALKTO
        verbTalkTo = function() {
            sayLine("I don't think it's wise to wake a sleeping pirate.")
        }
    }
    dog =
    {
        name = "dog"
        flags = TALKABLE
        defaultVerb = VERB_TALKTO
        verbTalkTo = function() {
            sayLine(dog,"Grrrr.")
        }
    }

    scummBarDockDoor =
    {
        name = "door"
        flags = DOOR_BACK
        defaultVerb = VERB_OPEN
        autoclose = YES
        verbLookAt = function()
        {
            sayLine("It's a door.")
        }
        verbPickUp = function()
        {
            sayLine("I can't! It's been glued to the floor.")
        }
        verbUse = function(obj=null)
        {
            sayLine("No way!")
        }
        verbWalkTo = function()
        {
            exitRoomFromDoor(this, Dock.dockScummBarDoor)
        }
        verbOpen = function()
        {
            openDoors(this, Dock.dockScummBarDoor)
        }
        verbClose = function()
        {
            closeDoors(this, Dock.dockScummBarDoor)
        }
        verbPush = function()
        {
            verbOpen()
        }
        verbPull = function()
        {
            noReach()
            sayLine("There's no handle on the door.")
        }
    }
}
Pack the files
The first time, you’ll need to extract all the files from ThimbleweedPark.ggpack1 in a directory.
In this tutorial I will use ggpack tools:
ggpack -extract "*" ThimbleweedPark.ggpack1
Now in this directory, don’t forget to copy our new room files:
ScummBarSheet.jsonScummBarSheet.pngScummBar.wimpyScummBar.nut(rename it toScummBar.bnut)
We are almost done, we need to declare our room in the DefineRooms.bnut, add this statement:
include("ScummBar.nut")
defineRoom(ScummBar)
Now we want to start the game directly in the ScummBar, edit the boot.bnut and locate this code:
if (do_opening) {
  g.openingScene = 1
  startglobalthread(newOpeningScene)
  return
}
Modify it to:
if (do_opening) {
  g.openingScene = 1
  //startglobalthread(newOpeningScene)
  startglobalthread(enterScummBar)
  return
}
And add this code before
 script enterScummBar() {
  actorSlotSelectable(ray, ON)
  actorSlotSelectable(reyes, ON)
  actorSlotSelectable(ON)
  cameraInRoom(ScummBar)
  actorAt(ray, ScummBar.scummBarDoor)
  selectActor(ray)
  cameraFollow(ray)
  inputVerbs(ON)
  inputOn()
}
it’s time to pack all files
ggpack -create "*" ThimbleweedPark.ggpack1
Watch out! Before executing the next step, make a copy of your original ThimbleweedPark.ggpack1 file
Move or copy this file to your game directory.
Et voilà, I hope you enjoyed it as mush as I did, don’t hesitate to share your remarks in the comments and please let me know if you create your own room, it would be amazing. Don’t be shy if you have any questions, I will try to answer them, or if you want more tutorials let me know.
Leave a comment