Lighting
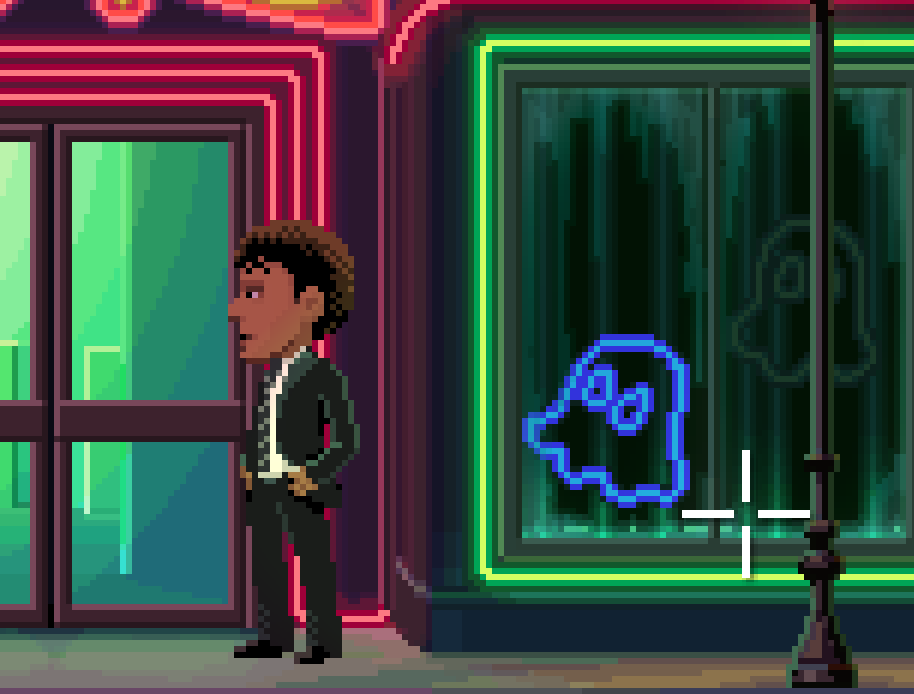
This post is about lighting in Thimbleweed Park, I don’t know you, but I found the ligthing in Thimbleweed Park marvelous. It’s subtle and nice, when an actor is walking in front the arcade, his face becomes green and then pink due to the neons color.

Before going deeper in all the explanations, I will describe how lights are defined in Thimbleweed Park.
Actually, all the lights are defined in the script files, directly in the room script.
More precisely they are defined in the enter function like this:
enter = function(enter_door)
{
    setAmbientLight(0x77909d)

    _lightObject1 = lightSetUp(0xfff892, 160, 278, 0.5, 180, 50, 0.15, 250, 0.75, 0, 97)
    _lightObject2 = lightSetUp(0xfff892, 527, 278, 0.5, 180, 50, 0.15, 250, 0.75, 0, 97)
    _lightObject3 = lightSetUp(0xfff892, 869, 278, 0.3, 180, 50, 0.15, 250, 0.75, 0, 97)

    _lightObject4 = lightSetUp(0xfff892, 628, 185, 0.4, 180, 60, 0.25, 250, 0.65, 93, 100)
    _lightObject5 = lightSetUp(0xfff892, 2133, 178, 0.4, 180, 90, 0.15, 250, 0.25, 0, 118)

    _lightObject6 = lightSetUp(0xf78a00, objectPosX(aStreetTrashCan), 114, 0, 0, 270, 0.15, 80, 0.25, 76, 96)
    _lightObject7 = lightSetUp(0xffed93, objectPosX(aStreetSaleSign), 114, 0.6, 0, 270, 0.15, 80, 0.25, 68, 97)
}
As you can see you can specify an ambient light color with setAmbientLight function.
This one is easy ;)
The following lines setup all the directional lights with an helper function lightSetUp defined in Helpers.nut.
Here the details of this function:
function lightSetUp(color, x, y, brightness, direction, angle, falloff, cutoffRadius, halfRadius, nearY = null, farY = null) {
 local light = 0
 light = createLight(color, x, y)
 lightBrightness(light,brightness);
 lightConeDirection(light,direction);
 lightConeAngle(light,angle);
 lightConeFalloff(light,falloff);
 lightCutOffRadius(light,cutoffRadius);
 lightHalfRadius(light,halfRadius);

 if (nearY != null && farY != null) {
 lightZRange(light, nearY, farY)
 }
 return light
}
I tried to find some information on internet how to create this lighting effect, I found of course this well-known blog: QuickiePal but there is no much explanation.
After several hours of searching, here is what I found interesting:
So I started with the project “cocos2d-x dynamic light tutorial”. The result is nice, it gives a 3D effect with an additional normal map to give for every sprite.
![]()
With this well-explained tutorial, I have all these properties resolved:
- color of the light source and position of the light in the scene needed by
createLight(color, x, y) - the brightness of the light (
lightBrightness) - the radius at which the light source does not have any effect on the sprite (
lightCutOffRadius) - the radius at which the light’s intensity decreases to 50%. The value range is [0 … 1], relative to the cut-off radius. A value of 0.5 will give you a soft light, a value of 1 a light with hard edges. (
lightHalfRadius)
Then I tweaked the shader and C++ code to remove the 3D effect (normal map) and I added the other missing properties:
- cone direction
- cone angle
- cone falloff
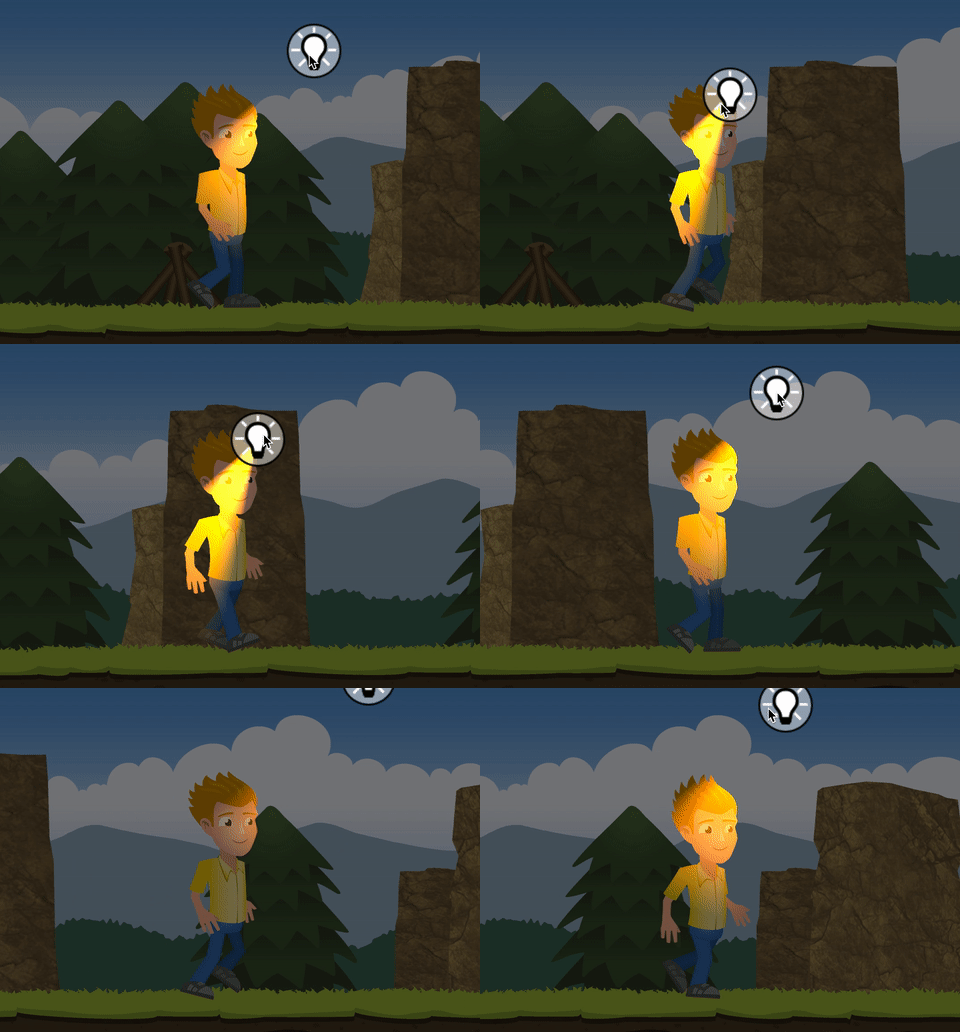
Here is the final result, not so bad, isn’t it ?

In the LightEffect::init, I added the missing properties and initialized the properties like this:
- cone angle: 40°
- falloff: 0.2
- code direction: 60°
bool LightEffect::init()
{
    if (initGLProgramState("pointlight.frag"))
    {
        setLightColor(cocos2d::Color3B::ORANGE);
        setAmbientLightColor(cocos2d::Color3B(127,127,127));
        setLightCutoffRadius(500.0f);
        setLightHalfRadius(0.5f);
        getGLProgramState()->setUniformFloat("u_coneCosineHalfConeAngle", cosf((M_PI/180.f) *(40.f / 2.f)));
        getGLProgramState()->setUniformFloat("u_coneFalloff", 0.2f);
        getGLProgramState()->setUniformVec2("u_coneDirection", Vec2(cosf((M_PI/180.f)*60),sinf((M_PI/180.f)*60)));
        return true;
    }
    return false;
}
And the shader code:
#ifdef GL_ES
precision highp float;
#endif

varying vec2 v_texCoord;

uniform vec2  u_contentSize;
uniform vec3  u_ambientColor;
uniform vec2 u_spritePosInSheet;
uniform vec2 u_spriteSizeRelToSheet;
uniform vec2 u_spriteOffset;

uniform vec3  u_lightPos;
uniform vec3  u_lightColor;
uniform float u_brightness;
uniform float u_cutoffRadius;
uniform float u_halfRadius;
uniform float u_coneCosineHalfConeAngle;
uniform float u_coneFalloff;
uniform vec2  u_coneDirection;

void main(void)
{
    vec4 texColor=texture2D(CC_Texture0, v_texCoord);

    vec2 spriteTexCoord = (v_texCoord - u_spritePosInSheet) / u_spriteSizeRelToSheet; // [0..1]
    vec2 pixelPos = spriteTexCoord * u_contentSize + u_spriteOffset; // [0..origSize]
    vec2 curPixelPosInLocalSpace = vec2(pixelPos.x, u_contentSize.y -pixelPos.y);

    vec3 diffuse = vec3(0,0,0);

    vec2 lightVec = curPixelPosInLocalSpace.xy - u_lightPos.xy;
    float coneValue = dot( normalize(-lightVec), u_coneDirection );
    if ( coneValue >= u_coneCosineHalfConeAngle )
    {
        float intercept = u_cutoffRadius * u_halfRadius;
        float dx_1 = 0.5 / intercept;
        float dx_2 = 0.5 / (u_cutoffRadius - intercept);
        float offset = 0.5 + intercept * dx_2;

        float lightDist = length(lightVec);
        float falloffTermNear = clamp((1.0 - lightDist * dx_1), 0.0, 1.0);
        float falloffTermFar  = clamp((offset - lightDist * dx_2), 0.0, 1.0);
        float falloffSelect = step(intercept, lightDist);
        float falloffTerm = (1.0 - falloffSelect) * falloffTermNear + falloffSelect * falloffTermFar;
        float spotLight = u_brightness * falloffTerm;

        vec3 ltdiffuse = vec3(u_brightness * falloffTerm) * u_lightColor;

        float coneRange = 1.0-u_coneCosineHalfConeAngle;
        float halfConeRange = coneRange * u_coneFalloff;
        float conePos   = 1.0-coneValue;
        float coneFalloff = 1.0;
        if ( conePos > halfConeRange )
        {
            coneFalloff = 1.0-((conePos-halfConeRange)/(coneRange-halfConeRange));
        }

        diffuse += ltdiffuse*coneFalloff;
    }

    vec4 finalCol = texColor;
    if(finalCol.a == 0.0)
    {
        diffuse = vec3(0,0,0);
        finalCol.rgb = texColor.rgb;
    }
    else
    {
        finalCol.rgb = finalCol.rgb * u_ambientColor;
    }
    gl_FragColor = vec4(finalCol.rgb + diffuse, finalCol.a);
}
The next step will be to integrate this effect into engge.
Bonus
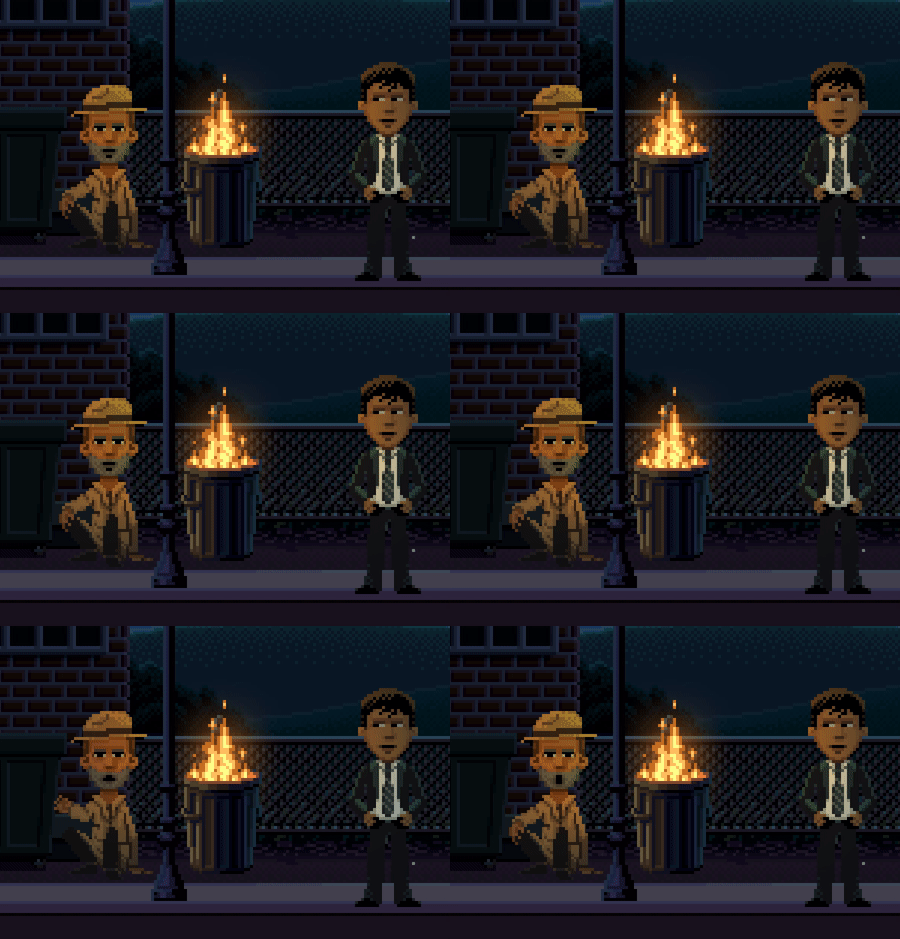
In this animation, you can see a fire is crackling, and you can see the effect of this crackling on the face of the actors. Wow I can almost feel the warm of the fire.

How is it done ?
Well this effect is done with only these few lines:
 script williesFireLighting() {
   do {
     lightBrightness(_lightObject6, random(0.4,3.0))
     breakhere(2)
   }
 }
Magic isn’t it ?
This is a loop where every 2 frames, the brightness of the fire light is changed with a random value between 0.4 and 3.0, simple but clever.
Leave a comment